
Footprinting with Recon-NG
In this lab we will see how to use recon-ng to perform footprinting of a target.

On startup recon-ng we find an empty framework. The first thing we must do is install modules that enable different types of functionality in recon-ng (we can think of them as extensions or plugins).
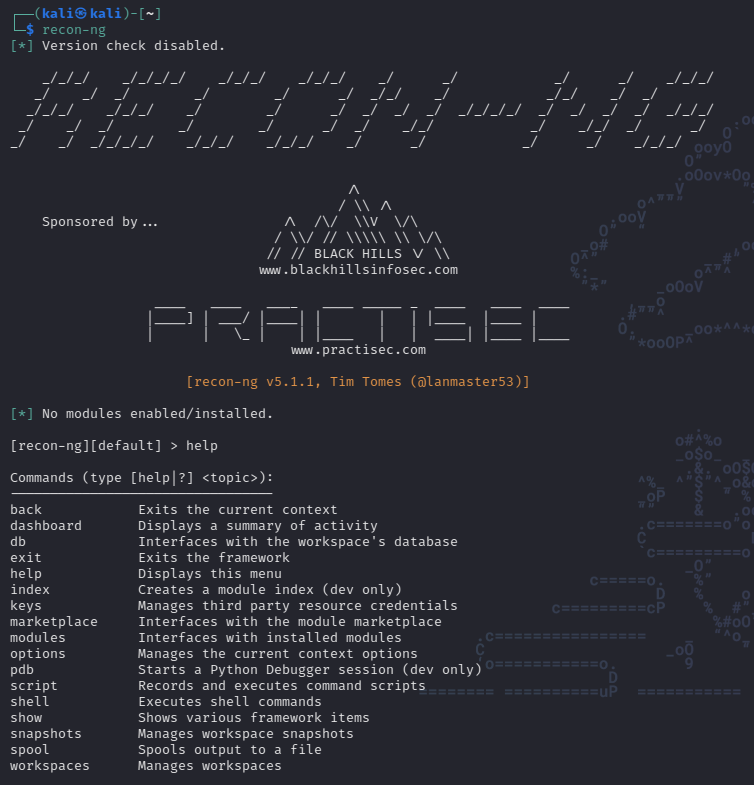
To see the available commands we use the command help:
Using Modules
With any framework that uses modules or extensions we must know which commands are available so we can search for, install and remove modules when we no longer need them.
Searching Modules in the Marketplace
To search which modules are available for recon-ng, we have the command marketplace search, with which recon-ng will show a list of modules available to be installed:
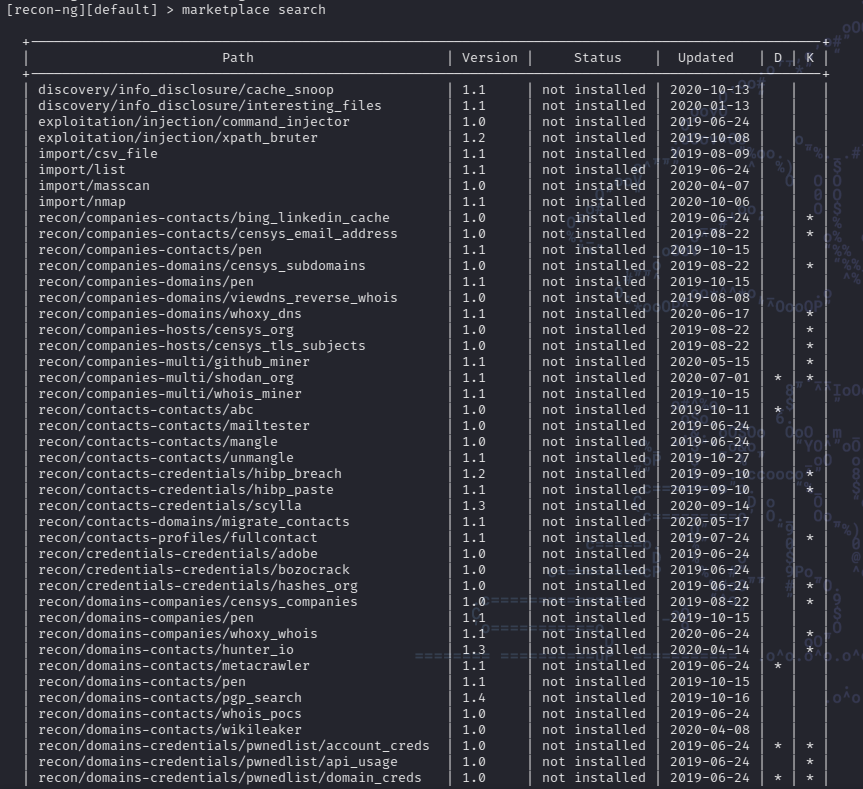
The list of available modules is quite extensive, and we see that among the details we have path, version, status, updated.

Additionally we have two columns called D and K that indicate if the module has Dependencies (D) or if it requires a key (K), as is for example the case of shodan_ip.
Adding API keys
If the module we try to use requires an API key, we can add it to recon-ng as follows: keys add shodan_api {API_KEY}:

The added keys are stored in the file
keys.dbin the folder where recon-ng is installed.
Installing Modules
To be able to install modules, we have the command marketplace. To install a module, for example shodan_ip. We use the following command: marketplace install shodan_ip:

This way we leave the selected module installed.
Loading and configuring Modules
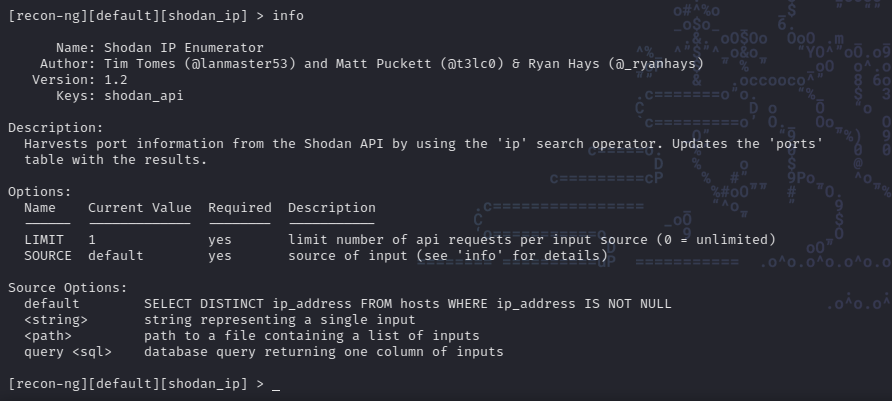
It is necessary to load the module you want to use, in this case: modules load shodan_ip. Similar to other frameworks like metasploit. In recon-ng modules have different options that we must set in order to run them. To see the required (and optional) options of the selected module we use the following command: options list:

If we run the command info, we can see the different types of options that can be set and their current values. Additionally we get a detail of which values we can set for the option SOURCE.
Setting Options
To set options we use the command options set {OPTION_NAME}, in this case the module needs that SOURCE is set. The source in our case is the target IP (obtained on shodan.io):

Running the Module
At this point we are ready to run the module, for that we use the command run:
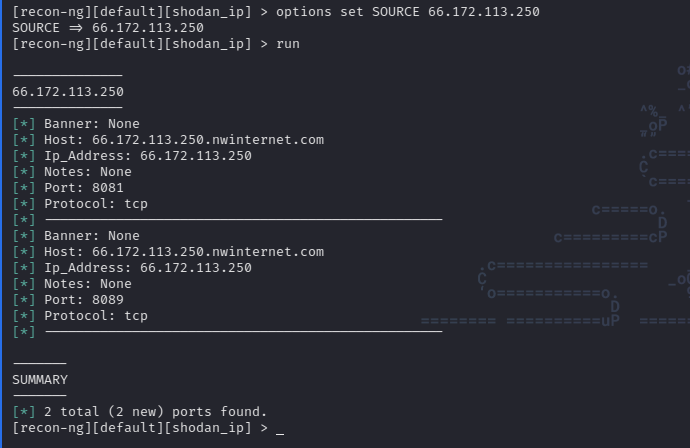
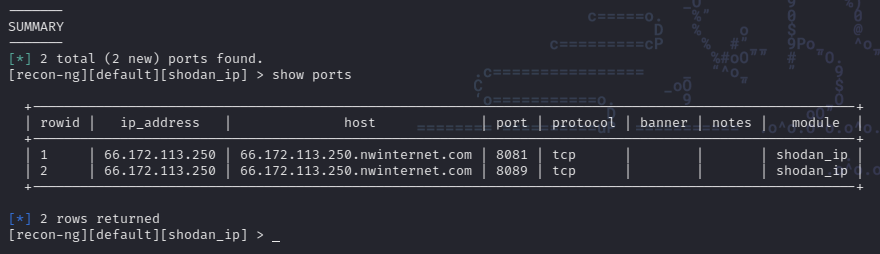
As we can see the module performs a scan of the target and returns certain details about it. If we enter the command show ports we can see the list of ports discovered during the scan:
It is also possible to use other modules that return other types of information. For example we can install the module whois_pocs, configure it and run it:
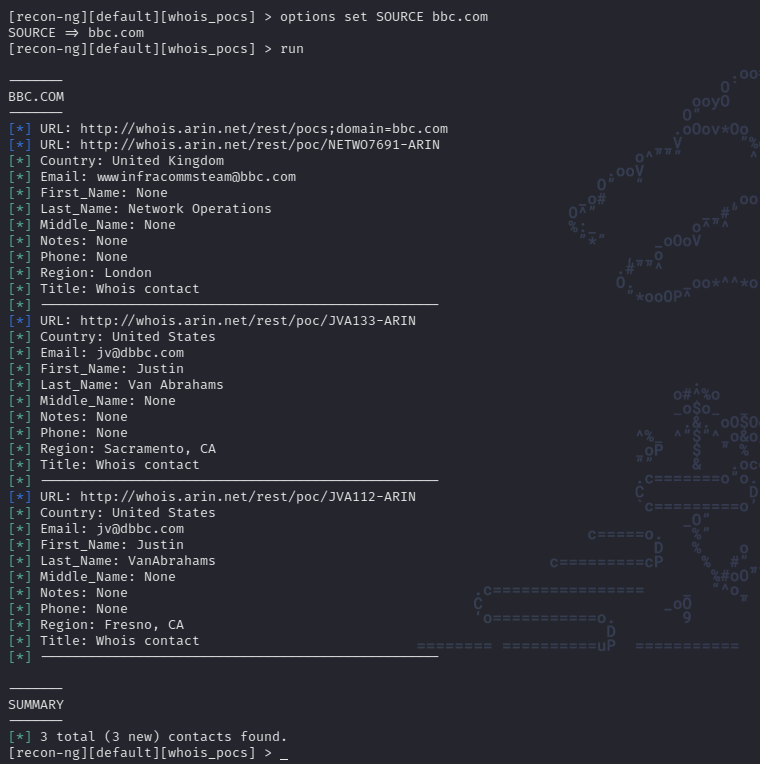
This way we perform a simple scan using shodan to obtain open ports and then using the module whois_opcs we obtained information from whois in an additional scan.
Workspaces in Recon-ng
It is important to keep in mind that recon-ng allows us to organize our information in different workspaces or work spaces. The advantage of this is that we can have our information separated for example, by targets or clients for whom we are doing reconnaissance. This way it is very simple to have a space for example for everything related to our reconnaissance tasks for microsoft.com and in another workspace have everything related to udemy.com.
The use of workspaces is very simple as we see below:
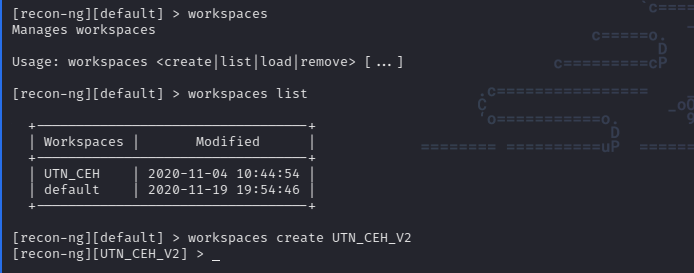
workspaces listlets us see all existing workspaces.workspaces create {WORKSPACE_NAME}allows us to create a new one.workspaces load {WORKSPACE_NAME}allows us to load and mark a given workspace as active.workspaces remove {WORKSPACE_NAME}allows us to delete a workspace.
Last updated
Was this helpful?